LiftAuth API Overview
Welcome to LiftAuth! This guide will help you understand our terminology, sequence of events, and provide you with the necessary steps to integrate our system with your robots.
Terminology
Device
A device refers to the smart LiftAuth hardware infrastructure installed on your premises. This could be a push button, an elevator button, or a door. Our devices are not necessarily connected to the internet; instead, they expose a Bluetooth API for communication. This ensures our devices function even in locations without stable internet access.
Robot
A robot refers to the mobile hardware used to interact with our infrastructure. While we expect it to be running ROS, our APIs are documented to allow integration with custom stacks as well.
Cloud Servers
We provide HTTPS API services for your robots to retrieve OTPs and a web application to collect API keys. You can find our web app at www.liftauth.web.app.
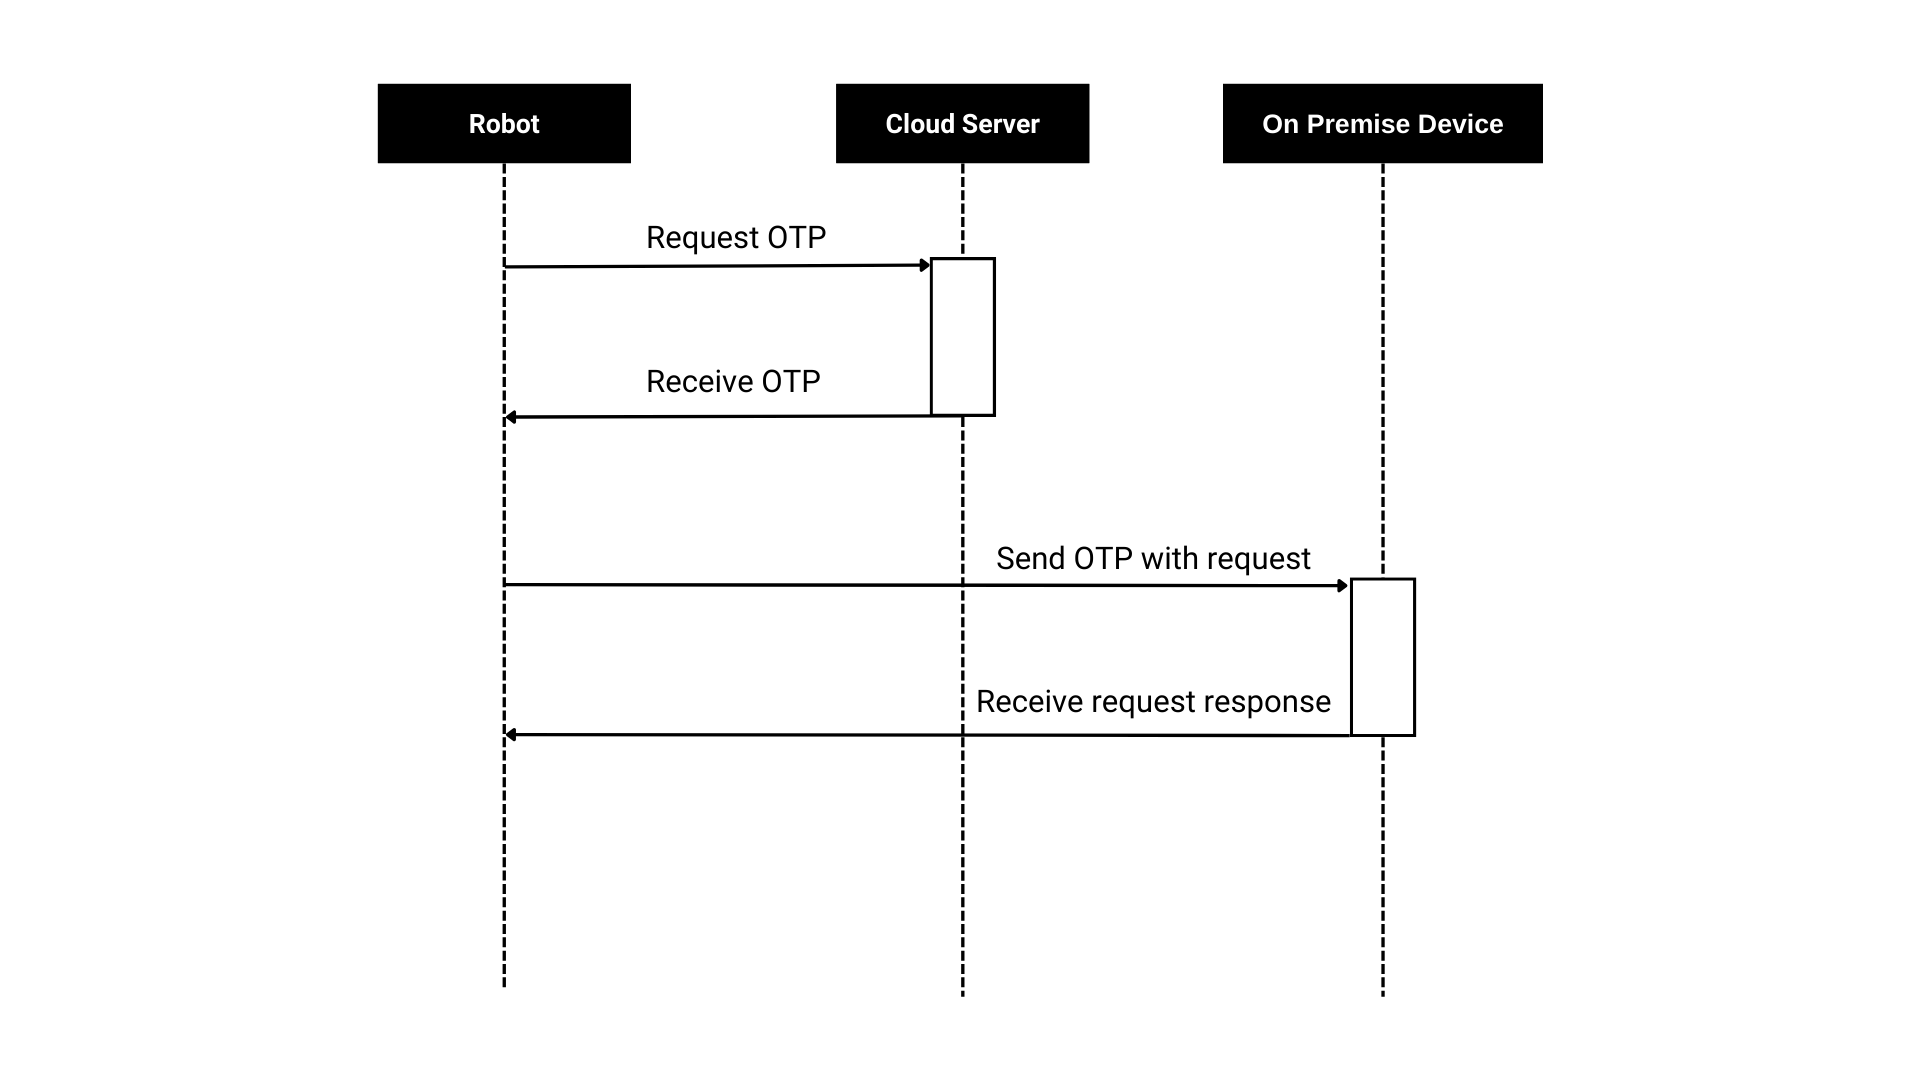
Sequence of Events
- Request OTP: The robot requests an OTP from the cloud server, providing its device ID.
- Connect to Bluetooth Device: The robot uses the OTP to authenticate and connect to the Bluetooth device.
- Perform Actions: The robot performs actions on the Bluetooth device using the authenticated connection.
Detailed Steps
1. Request OTP
Use the OTP Generation API to generate the OTP. The API will return the necessary device data needed to connect to the device. There are four key pieces of data required to connect to the BLE device:
otp: A one-time password that is valid for 30 minutes.datetime: A timestamp representing when the OTP was generated.serviceUUID: Needed to identify the BLE device in the vicinity.characteristicUUID: Needed to identify the Bluetooth service to write to.
2. Scan for BLE Devices
Use the serviceUUID and characteristicUUID to find and connect to the device.
3. Send the Command
Write the JSON payload with otp and datetime to the characteristic to make your request.
Example JSON Payload
{
  "otp": "your-otp-here",
  "datetime": "timestamp-here"
}
Conclusion
For more detailed examples and documentation, visit our Python Quickstart Guide.